Pages

Friday, May 31, 2013

Garden Vegetable Bacon Egg Muffin

I was walking down the Costco frozen section, and I noticed zucchini egg muffins. They looked delicious and convenient. A quick pop in your mouth on your way out the door in the mornings. I looked at the ingredients and realized how simple they were.  "I can make them at home" was my finally thought as I put the box back and walked to the next aisle. When I got home I looked online for breakfast egg muffins recipes. There are so many variations. I also looked for quiche, and frittata's recipes. My recipe is a combination of various recipes found online and my favorites ingredients.  I placed the individual vegetables in the muffin pan instead of combining all in a bowl. This method will ensure that each muffins has the same quantity of vegetables.  

1/3c       zucchini  
1/3c       red onions
1/3c       kale
1/3c       red pepper
1/3c       diced potato with season salt
6            eggs
3/4c       coconut milk
1/4c       pepper
1t          salt
1/4t       garlic powder
12         slices of turkey bacon
 
Preheat oven for 350 degrees.

1.   Dice all the vegetables and keep them separated.
2.   Cook the potatoes in a pan until done, about 15 minutes. Season with season salt and garlic powder.
3.   Spray the muffin pan with oil
4.   Place the bacon around the inside of each muffin space.
5.   Add your vegetables and potatoes
6.   Whisk the eggs and milk.
7.   Season with salt and pepper and pour in each muffin space about 3/4 full.
             8.   Bake for about 20 minutes, or until a knife inserted in the middle comes out clean.

I added goat cheese to my muffins after I took them out of the oven. I did not prefer it. The cheese changed the flavor dramatically. Good for me I only added cheese to that one muffin. Therefore add cheese cautiously and add your own risk.

3 Ingredients Granola Cookies


I was looking for a fast and tasty oatmeal cookie recipe that was also healthy. I found this at Pinterest, but modified the recipe.  The recipe called for instant oatmeal, but I only had steel cut. I stood in front of my pantry and saw granola cereal. I decided that would be a good substitute. My granola had almonds and vanilla extract. You can use your favorite flavor variety. Here is my version of the recipe:

2 1/2c      Granola (any variety) 
2              Overripe Bananas
                Chocolate Chip


Preheat oven to 350.

1. In a bowl placed all the granola and bananas.

2. With a fork, mashed the bananas with the granola until combined.

3. Form 1 inch balls and place them in a oiled baking pan. It should look like thick oatmeal. If you can't form a ball that holds, add 1 T of granola at a time.

4. Flatten the cookies with your fingers.

5. Insert 3 chocolate chips per cookie. This is a good way to control how much chocolate each cookie has. Even Steven !!!

6. Bake at 350 for about 15 minutes or until golden brown.

7. Move cookies to a wire rack and cool.

These cookies have no sugar and no flour. You can use dairy free chocolate chips for a vegan version. You can also use gluten free oats instead of granola if you are sensitive to those ingredients. 

Avocado Mousse/Pudding

 I love chocolate and I probably eat a few serving sizes in one sitting. Therefore I decided to look for recipes that are better for me.   There are varies recipes for avocado mousse in pinterest. I decided to use one that had the least amount of ingredients.Fast and simple was my idea. I also decided to use ingredients that are more beneficial to me. 


My first step was to upgrade to cacao powder.   Cacao has more antioxidant flavonoids than any food tested so far, including blueberries, red wine, and black and green teas. In fact, it has up to four times the quantity of antioxidants found in green tea. It also contains an abundance of magnesium and iron.
Read more: http://navitasnaturals.com/product/441/Cacao-Powder.html

I also switch to xylitol sugar. Xylitol is only slowly absorbed and partially utilized; therefore allowing a reduced calorie claim, 2.4 calories per gram or 40% less than other carbohydrates and none of the negative tooth decay or insulin release effects of sugar. It also has a low glycemic index (7) and has little effect on blood sugar levels. In addition, the body does not require insulin to metabolize xylitol, which has made it a widely used sweetener for the diabetic diet in some countries.
Read more: http://www.xlear.com/about-xylitol.aspx

The main ingredients is aquacate/avocado. Avocados contain a wide variety of vitamins, such as vitamin A, vitamin C and vitamin E, that have antioxidant properties to help ward off illness and disease. Avocados are considered a good source of soluble fiber. Soluble fiber is an important part of a healthy diet because it helps reduce overall cholesterol levels in the blood. Diets high in monounsaturated fat can reduce the risk of heart disease and other cardiovascular problems. About 82 percent of the fat found in an avocado is in the form of healthy monounsaturated fat.
Read more: http://www.livestrong.com/article/241640-avocado-nutritional-benefits/#ixzz2JqqHibPW

To make all the ingredient blend together I used coconut milk. I love the taste of coconut so I also added coconut oil. But you can omit this flavor and just use any milk. The reason I love coconut milk is it helps in controlling your weight.  Coconut milk makes you feel full very quickly because of high concentrations of dietary fiber. In addition, it aids in building strong bones. Coconut milk is not rich in calcium, but it is rich in phosphorus. Phosphorus is an essential nutrient that the body needs for strengthening bones. It is must to take phosphorus with calcium particularly to prevent bone loss because it supplies phosphate to the body. Coconut milk helps in warding off colds and coughs by keeping the immune system healthy. It supplies vitamin C to the body which boosts the immune system.
 Read more: http://www.drgranny.com/2011/05/05/benefits-of-coconut-milk/ 

OK now here is the recipe:

1/3 c          Cacao Powder
2                Avocados
1/4c           Xylitol Sugar
1/2c           Coconut Milk
2T              Coconut Oil (optional)

Put all the ingredients in a food processor and puree.  Add more milk to change the thickness of the mousse.
This is how it looks half way through pureeing . You can still see some avocado lumps. I added two more tablespoons of milk and continued to puree.
This is the final product. I loved it!!! It was creamy and had a rich chocolate flavor. I was able to make this snack in about  3 minutes.  I can definitely make this as an after school snack without the guilt of other chocolate treats.

Chickpeas Garden Sandwich


This is my favorite vegetarian sandwich to eat.   I love the kick the cayenne pepper gives to the chickpeas. Chickpeas also provide the protein to the sandwich.  Besides the fact that it is easy to make, it is very versatile.  You can add almost anything to this sandwich; cheese, spinach, cucumbers, avocado, etc.  The possibilities are endless.. This sandwich includes:

1c             Cooked chickpeas beans
1/2t           Cumin
1t              Cayenne (I used Piquin Chili Powder)
                 Salt/Pepper
2               Tomatoes slices
1/4            Shredded Carrots
1/4            Alfalfa Sprouts
2               Slices of your favorite bread

1.    In a pan under medium heat add the garbanzo beans, salt, pepper, cayenne, and cumin.
2.    Mashed the beans coarsely and set aside.
3.    In a plate placed your bread side by side.(toasted if you prefer)
4.    Add your mashed beans on each slice of bread.
5.    Then add sprouts and carrots to one side.
6.    On the other side add the tomatoes and salt and pepper to taste.
7.    Pick up the bread with the tomatoes and flip onto the other side.
8.    Enjoy!!!

Papaya Peppercorns

Papaya Seeds Pregnancy
I love eating papaya. I have it with yogurt, in smoothies, and with lime and salt. But until now, I have thrown out the seeds. One day I decided to see if there are any health benefits to papaya seeds: there are numerous of them. So here I go again searching online, this time on ways to use those seeds. Now I know they taste peppery, therefore using them in a salad dressing was not surprising. I can across a couple of them that dried the papaya seeds to make into peppercorns. WHAT! Yes peppercorns. I was a bit thrown off by the time it took to dry the seed though...one site said overnight. No way I was leaving my oven on all night. So I can up with me version.  You probably have to adjust slightly the baking time based on your oven. But you can tell when it is done because they are hard as a (say it with me) peppercorn. Here are the instructions:


Seeds from a papaya


1. Set your oven to 250 degrees.

2. Cut the papaya the long way.

3. With a spoon slowly and gently scrape the seeds off the papaya and into a baking pan (no oil).  This procedure will ensure that you do not scrape some of the flesh with the seeds. If you do have a little, it o.k. The flesh will dry in the oven.

4. Spread the seeds throughout the pan and put it in the oven for 10 minutes.

5. After this time, shake the pan to rotate the seeds. Some seeds will get stuck to the pan. Don't worry, used a spatula to free them. 

6.  Bake the seeds for 15 more minutes. The seeds should be hard as peppercorns by now. If not, add  5 more minutes to your cooking time. That should do it.

7. Fill a pepper mill with your seeds and enjoy.


Research has found that papaya seeds are effective against E. coli, Salmonella, and Staph infections. Research has also found that papaya seed extract may protect the kidneys from toxin-induced kidney failure. There is evidence that papaya seeds eradicate intestinal parasites. In a study done on Nigerian children with intestinal parasites, 76.7% of the children were parasite-free after seven days of treatment with papaya seeds compared to only 16.7% of the children who received a placebo. In Chinese medicine, it is believed that a teaspoon of papaya seeds will help detoxify the liver. Papaya seeds are often recommended by natural doctors in the treatment of cirrhosis of the liver.

Read more: http://www.livestrong.com/article/543510-the-nutritional-value-of-papaya-seeds/

Flax Seed Tortillas


My family and I tried for 14 days to live without bread. The idea was to detox our body of the gluten found in our daily food choices. Then incorporate sprouted wheat items back into our diet, slowly. A quick substitute for us was tortillas. But the problem I can across while shopping for tortillas is that they are made out of corn or flour. I wanted an alternative to tortillas that were gluten free and corn free. I did not find any at the grocery stores, so I started looking for gluten free, corn free recipes for tortillas recipe online. I can across this recipe in Pinterest and loved it. I modified it a bit, so here is my version.

1/4c      Flax Meal
6 T        Hot Water
1c         Flax Meal
2T        Quinoa flour
1t          Salt

Combine 1/4c flax meal and the hot water and mix it and forget it. It will form a gooey paste. In a separate bowl add 1c of flax meal, flour, salt and your flax meal paste. Knead with wet hands and form 8 balls.  Flatten thinly under two parchment paper or two plastic bag squares. If you want perfect circle tortillas use a bowl to cut out your shape.  Lightly oil your pan and heat your tortilla under medium heat. Each side should be 15-20 seconds. The longer you cook the tortillas, the crispier.  Serve and enjoy.

UPDATE:

I had the idea to convert my tortillas into a gluten free Wasa like flat bread. I made the tortilla thicker and cooked it for about 30-40 seconds.  I top it off with peanut butter and jelly. AMAZING!!! The flat bread was crispy and the flax seed did not overpower the toppings. This is a great alternative to crackers. Its gluten free, dairy free and nut free.

Wednesday, March 6, 2013

Natural Rehydrating Tea

My kids had the stomach flu and were throwing up throughout the day. Needless to say our Gatorade supply ran out. I did not want to leave my kids alone to run to our grocery store. And I did not want to drag my sick kids out to the store. Nevertheless I needed something the kids could drink to rehydrate. Then it happened, I flipped the container of Gatorade around and saw the ingredients; water, sucrose syrup, glucose-fructose syrup, citric acid, natural grape flavor with other natural flavors, salt, sodium citrate, mono-potassium 
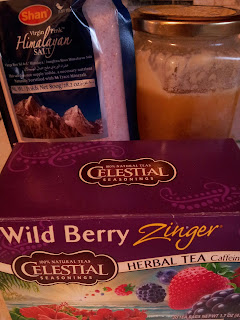
phosphate, red 40, Blue 1. WOW!!! Good thing I did not have anymore. I decided to search for something natural. The solution was found online when I Google healthier alternatives to Gatorade. Wellnessmama.com was the site I based my recipe on. The recipe called for fruit flavored juice, but I just used fruit flavored tea. There are so many varieties at the store that you can find a tea that you like. My kids loved the Wild Berry tea dehydrator. I also made frozen pops that they loved even better. Bye Bye Gatorade.

1              Quart of water
2T            Honey
1/8           Sea Salt
                (contains minerals)
4-6bags    Fruit Flavored Tea


1. Boil 2 cups of water and steep the tea.

2. Remove the tea bags and add honey and salt. Stir until all is dissolved well.

3. Pour into a container and add the rest of your water (2 cups more). 

4. Drink hot or cold.

Based on the Global Healing Center the Himalayas Salt is known as “white gold,” Himalayan Crystal Salt contains the same 84 natural minerals and elements found in the human body. This g form of salt has also been maturing over the past 250 million years under intense tectonic pressure, creating an environment of zero exposure to toxins and impurities.
Himalayan salt’s unique cellular structure allows it to store vibrational energy. Its minerals exist in a colloidal form, meaning that they are tiny enough for our cells to easily absorb.

Read more: http://www.globalhealingcenter.com/natural-health/himalayan-crystal-salt-benefits/
 

Monday, March 4, 2013

Coconut Basmati Rice

I really enjoy the flavor of basmati rice. Even more so if it is coconut flavored. I have made this rice along side curry sweet potato. The flavor mix well and chickpeas adds protein. Together it is a complete vegan meal.  I estimated that 1 cup of rice makes 12 servings sizes. Each serving size was 1/4c. The above picture was made my filling a 1/4 measuring cup with rice and inverting it to my plate.


1c           Basmati Rice
13.5oz    Coconut Milk (1 can)
1/2t         Salt
1/2t         Garlic Powder
2T           Coconut Oil

1.  Set your burner for medium-high heat. In a medium pot add your oil and rice.

2.  Saute until the rice is translucent.

3.  Add the coconut milk, salt and garlic powder.

4.  Bring to a boil.  Simmer on low and cover pot.

5.  Simmer for about 15 minutes or until the milk is absorbed.

6.  Turn heat off and wait 5 minutes then fluff with a fork.

Sunday, March 3, 2013

Kale Chips in a Pan

 
I tried to make kale chip in the oven and I was not happy with the results. Maybe I did it wrong, but I did not have the motivation to try it again. Until I tried to saute some kale for a recipe I found on allrecipe.com. The result were crispy kale chips.  This recipe was so easy to make and is a healthy alternative to fried potato chips. And sauteing them in the pan makes this snack fast and easy.  I use coconut oil, but you can uses what you have at home. Coconut oil gives the chips a nice creaming butter like taste to them.

2c      Kale leaves
2T     Coconut Oil
         Salt/Pepper
2       Garlic Cloves Chopped

1.Saute the garlic until lightly brown.

2. Add kale and season with salt and pepper. Toss the kale so it gets coated evenly with the coconut oil. 

3. Continue to stir kale until it turn brown, remove and serve. Crispy kale chips in less than 10 minutes!!!

Rustic Salsa Ranchera


My mother-in-law makes a killer salsa ranchera. Every one comments on how good and spicy it is. My husband loves it too, but has to wait until he is at his mom's house to have it. Therefore I decided to make it for him at our home. But I did not want to try to duplicate his mom recipe. I knew it would never come close. I started with the same ingredients, but added one extra ingredient to make it my own. Roasted red bell pepper were my secret ingredient. They blend so well with red tomatoes and the texture of the jalapenos. My husband loved my salsa. He did not compared it to his mom, it was just a good salsa.  My family is Mexican and we love our spicy food. We can add salsa to almost anything. This particular salsa is great on sunny side eggs which are called Huevos Rancheros. I used it with quesadillas, and add it to my tacos. I have made a vegetarian taco using only the salsa and no meat. It is great!!! The salsa ranchera ingredients are typically in chunks, but I prefer the strips. You decided how you want to prep your salsa. This recipe is very simple, even easier if you broil all the ingredients with oil until charred.

1      Sliced Jalapeno (with seeds or without seeds)
1      Medium Sliced Onion
1      Red Sliced Bell Pepper
2      Fresh Tomatoes (can tomatoes can work too)
        Salt to taste

If you did not use your oven, here is how to saute it on the stove top.

1. Over medium heat, put oil on a pan and add the onions, Saute until translucent  for about 4 minutes.
2. Then add jalapenos and saute for about 2 minutes. Jalapenos with seeds are spicier. Choose your heat wisely.

3. Next add the bell pepper and saute until they are soft. About 4-5 minutes.

4. Add the diced tomatoes and bring to a boil.  Once it bubbles lower heat, cover pan and simmer for about 10-15 minutes. If it looks too dry, add water. I like my salsa a bit runny, so I check on it periodically and add water accordingly.
 
5. Season with salt and serve

My favorite way to use this salsa is in Huevos Rancheros. Fry a tortilla in light oil for 15 seconds each side over medium heat, and seat on a plate. Make two sunny side eggs and place on top of your tortilla. Finally  add your salsa.


Hummus Sweet Potato Pizza Bites


This recipe was created when I started incorporating more vegetarian dishes. At first I used the roll out pizza dough from the grocery store. But I would have to wait until I bought some in order to make my pizza. One day I decided to make it used toast...it was delicious. Then I tried a toastada...amazing. But using french bread is by far my favorite. The crust is crunchy, but the inside is soft. I love this pizza version sooo much. It is so easy to change it up and add your favorite vegetable toppings. I have tried carrots, butternut squash, red bell peppers, beets and spinach. But by far sweet potatoes are my favorite. The only real work is cooking your vegetables in the pan. I cut my potatoes in small pieces so they can saute faster. I use only one pan in this recipe. First I toast the bread, then cook the potatoes. Once the sweet potatoes are done, I quickly assemble my pizza. I noticed that the heat of the potatoes warms the bread and melts the cheese. You can definitely use your broiler to toast and melt the cheese too.

Italian Bread Slices
Sweet Potatoes Diced
Hummus (any variety)
Shredded Cheddar Cheese

1. I toast the bread in the ban, then set aside.

2. Add the oil and potatoes to the pan. I toss the potatoes occasionally until they are done. This can take 10-15 minutes, depending on the size of your potatoes. Just insert a knife tip through to sweet potato,  if it glides right in then it is done. 

3. Now assemble your pizza.  Spread hummus on your bread, add sweet potatoes, and quickly top with cheese.

I have tried marinara sauce instead of hummus. A tomato based sauce is a traditional ingredient to a pizza, but hummus gives it a nice creamy texture. I have used red pepper, artichoke, and spicy hummus spread. You can used what you prefer...the possibilities are endless.

Vegan Waffle


No eggs, no butter, and my kids were waiting for waffles. I knew they would understand....ha! Wait I just remembered...we are vegans. We don't need no stinking eggs. Hence, this recipe was born. Its easy and fast. The outcome is a great waffle recipe that does not need alot of ingredients. You can add what ever flour, milk and puree you prefer. I made my applesauce-strawberry puree waffles vegan and gluten free. You can add bananas, pumpkins, or those portable kids puree pouches. What ever you have on hand. The recipe only makes 4 waffles, so double the ingredients to feed your lovely kids.

1c         Quinoa Flour
2t          Baking Powder
1/4t       Salt
1/2 c     Coconut Milk
2t          Vanilla
1/2c       Fruit/Veggie Puree


1. In a bowl add all the dry ingredients.
2. Stir in all the wet ingredients in another bowl.
3. Pour the dry ingredients into the dry bowl and mix just until it is incorporated.
4. Heat your waffle maker and oil the bottom and top lids.
5. Pour 4 kitchen tablespoons in the center of the waffle maker and spead. Do not spread to the edge or it will spill over.
6. Cook for 10-15 seconds, or until the waffle maker's light turns green. Serve and enjoy

Quinoa Pico de Gallo

This recipe was a result of preparing too much food for a party.  We were serving shrimp ceviche and had chopped too many vegetables. By the end of the night we were out of shrimp but had a bowl of pico de gallo. Pico de Gallo is raw salsa made with chopped onions, tomatoes, cilantro, lime and jalapenos.  I add cucumber for added crunch. I was going to use the salsa with tortilla chips as a snack. Until I made quinoa for dinner the following day. I then had the brilliant idea to add the pico de gallo with the quinoa. And then I had a even better idea to add chickpeas. The results is a salsa/salad loaded with protein. This recipe is good on those nights you want something fresh and fast. It is also a good alternative to a garden salad. Here is my recipe:

1c         Quinoa (cooked)
1           Medium Cucumber
1/2c      Red Onions Diced
1           Big Tomato (Beefsteak)
1           Jalapeno
1can      Chickpeas (drained)
             Cilantro to taste
             Lime Juice
             Salt/Pepper to taste

1. Add quinoa to a bowl.


3. Chop tomato, cucumber, red onion, jalapeno and cilantro. Jalapenos with seeds are spicier than jalapenos without seeds. Choose your heat wisely.


4. Add your diced ingredients and drained garbanzos to your bowl of quinoa.

5. Squeeze as much lime as you like and season to taste.

This pico de gallo smell so fresh. It brings me back to summers in my garden. You smell the fresh cilantro, cool cucumber, and refreshing lime juice. I add Tajin to my dish. Tajin is dried chili peppers, and dehydrated lime juice. If you can not find it near the produce, you can use cayenne pepper.